
Table of Contents
概要
よくお世話になっているサイトのうち一つがstripeの仕様変更によってそのやり方が公式から非推奨になってしまったので新しいやり方を記載していきます。
Stripeを利用するための準備
stripeを利用するためにまずはユーザー登録を行います。
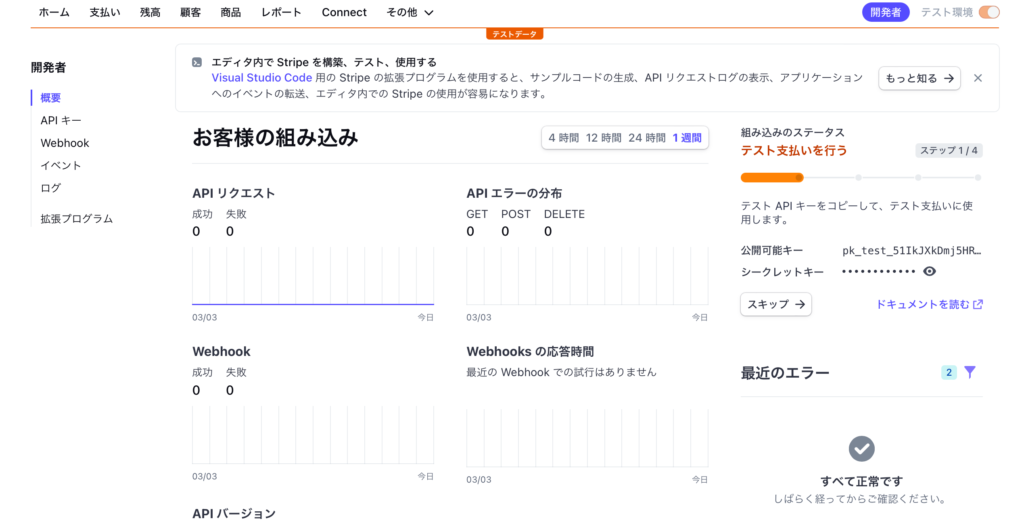
登録が済んだらダッシュボードを開発者→APIキーと開き、テスト用キーを表示ボタンを押し、2つのキーを表示しておきます。
それらをDjangoのsettings.pyに書き込みます。
STRIPE_PUBLIC_KEY = '公開キー'
STRIPE_SECRET_KEY = 'シークレットキー'Stripeを利用するためのPythonライブラリがありますのでpipでインストールしておきます。
pip install stripeこれでStripeを利用するための準備は完了です。
modelの作成
モデルはなんでもいいですが、ゲームが好きなのでゲームのECサイトみたいなものを作ってみます。以下のmodels.pyをサンプルに作成していきましょう
from django.conf import settings
from django.db import models
from django.utils import timezone

def random_url():
     chars = '0123456789abcdefghijkmnopqrstuvwxzyABCDEFGHIJKLMNOPQRSTUVWXYZ'
     url = ''.join(random.choice(chars)for i in range(30))
     return url

class Game(models.model):
      #ゲーム
    title = models.CharField('タイトル',max_length=255),
      price = models.IntegerField(default=1000),
      description = models.TextField('あらすじ'),
      create_day = models.DateTimeField('日付', default=timezone.now)
      slug = models.SlugField(unique = True,blank=True,default=random_url)
      icon =  models.ImageField('Icon',upload_to='media/game/icon', null=True ,blank=True)
      def __str__(self):
          return self.title
Gameモデルはとてもシンプルで、タイトルと値段のゲームのあらすじ等のフィールドを持ちます。Stripeでは日本円での決済ができるので単純なIntegerFieldにしましたが、使用通貨によっては小数点部分が必要になりますので、その際はDecimalField等を使います。
決済処理を行う
ここまではお世話になったブログと一緒ですが決済の処理が大きく異なってきます。まずはviews.pyを書いていきます。
from django.conf import settings
from django.shortcuts import redirect, render
from django.views import generic
from .models import Game
import stripe
stripe.api_key = settings.STRIPE_SECRET_KEY

class Game(generic.DetailView):
    model = Game
    def post(self, request,  *args, **kwargs):
        game = get_object_or_404(Game, slug=self.kwargs['slug'])
        try:
            checkout_session = stripe.checkout.Session.create(
                payment_method_types=['card'],
                line_items=[{
                    'price_data': {
                    'currency': 'jpy',
                    'unit_amount': game.price,
                    'product_data': {
                        'name': game.title,
                        'description': game.description,
                        'images': [game.icon.url],
                        },
                    },
                'quantity': 1,
            }],
            mode='payment',#'subscription'にすると月額支払いが可能
            success_url=request.build_absolute_uri(resolve_url('GAME:success',slug=self.kwargs['slug'])) + "?session_id={CHECKOUT_SESSION_ID}",
            cancel_url=request.build_absolute_uri(redirect('GAME:cancel')),
            )
        except stripe.error.CardError as e:
            context = self.get_context_data()
            context['message'] = 'Your payment cannot be completed. The card has been declined.'
            return render('GAME:game', slug=self.kwargs['slug'])
        else:
            return  redirect(checkout_session.url, code=303)

class SuccessView(generic.DetailView):
    model  = Game
    template_name = "app/pay/success.html"

class CancelView(generic.TemplateView):
template_name = "app/pay/cancel.html"Stripeの使い方としては、stripe.api_keyにシークレットキーを設定し、各種APIを叩いていくことになります。ここは儀式と思ってしまってください
大きく違う点は、JavaScriptの知識を必要としない点や、月額支払いや一回払いの切り替えが可能という点さらには、決済ページを作らなくていいという点があります。
次にurls.pyでリンク先を書いていきます。
from django.urls import path,include
from django.contrib.auth import admin
from . models import User, Comment
from . import views
from. import calculation
from django.contrib.auth import views as auth_views
from django.conf.urls import url
app_name = 'Game'
urlpatterns = [
  path('success/<slug:slug>/',views.SuccessView.as_view(),name='success'),
path('cancel/',views.CancelView.as_view(),name='cancel'),
path('create-checkout-session/<slug:slug>', views.Game.as_view(), name='create-checkout-session'),
]これで決済のバックエンド処理は完了となります。あとはhtmlに決済をつなげる書式を書けば完成です。
これを応用したのがこの動画の15秒から45秒までの感じになります。
これらの他にWebhookを利用してDjango側に購入履歴を設定できたりしますが、旧バージョンだとそれを使用せずともできたので少し複雑化したデメリットがありますが前よりも便利になっていると思います
追記
Webhookを使って購入履歴などのやり方は次の記事にしています。
参考にしたサイト
https://blog.narito.ninja/detail/63/
https://stripe.com/docs/api/checkout/sessions/create
こういったものも作っています
<form action="{% url 'Game:create-checkout-session'  movie.slug %}" method="POST">
{% csrf_token %}
            <button class="btn btn-outline-info " type="submit">Checkout</button>
          </form>